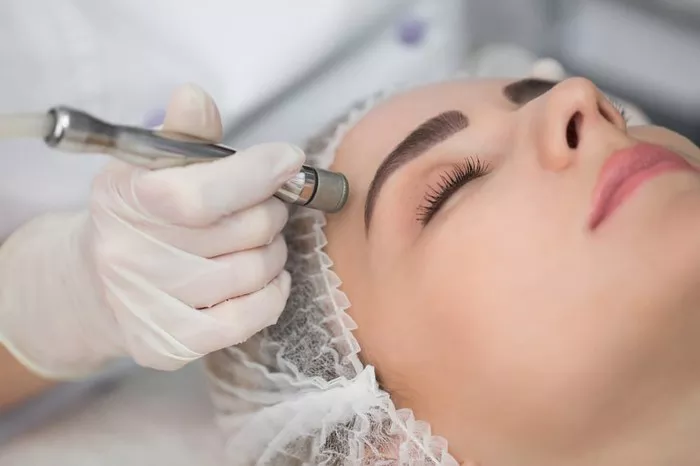
Microdermabrasion is a popular skincare treatment that exfoliates the skin, leaving it smoother, rejuvenated, and more youthful-looking. While professional microdermabrasion treatments are available, at-home microdermabrasion offers a convenient and cost-effective way to achieve similar results. In this comprehensive guide, we will explore how to do at-home microdermabrasion, the benefits of this DIY approach, and key considerations for safe and effective treatment.
I. What is Microdermabrasion?
Microdermabrasion is a non-invasive cosmetic procedure that involves the mechanical exfoliation of the skin’s outermost layer, known as the stratum corneum. This process removes dead skin cells, unclogs pores, and stimulates collagen production, resulting in a smoother and more radiant complexion.
II. Benefits of At-Home Microdermabrasion
At-home microdermabrasion has several advantages:
Cost-Effective: It is generally more affordable than professional treatments, making it accessible to a broader range of individuals.
Convenience: You can perform at-home microdermabrasion at your convenience, eliminating the need for appointments and travel to a skincare clinic.
Privacy: Some individuals prefer the privacy of at-home treatments, especially when addressing minor skin concerns.
Regular Maintenance: At-home microdermabrasion allows for regular maintenance, which can help maintain skin health and reduce the frequency of professional treatments.
III. How to Do At-Home Microdermabrasion
Performing at-home microdermabrasion involves several steps. Here’s a comprehensive guide on how to do it safely and effectively:
Step 1: Gather Your Supplies
Before you begin, make sure you have the following supplies ready:
At-home microdermabrasion kit (readily available online or at drugstores).
Mild facial cleanser.
Towel or washcloth.
Moisturizer.
Sunscreen (SPF 30 or higher).
Step 2: Cleanse Your Skin
Start by cleansing your face with a mild facial cleanser to remove makeup, dirt, and excess oils. Gently pat your face dry with a clean towel or washcloth.
Step 3: Follow the Kit Instructions
Each at-home microdermabrasion kit comes with specific instructions, so it’s essential to read and follow them carefully. Generally, the process involves the following steps:
Apply a small amount of the exfoliating cream or gel to your damp skin.
Use the microdermabrasion device or handheld exfoliating wand (provided in the kit) to gently exfoliate your skin. Follow the manufacturer’s recommended technique, which usually involves making small, circular motions while avoiding the eye area.
Rinse your face thoroughly with lukewarm water to remove the exfoliating product.
Step 4: Post-Treatment Care
After completing the microdermabrasion process, follow these post-treatment care steps:
Apply a moisturizer to help soothe and hydrate your skin.
Protect your skin from the sun by applying sunscreen with SPF 30 or higher. Sun protection is crucial after microdermabrasion, as your skin will be more sensitive to UV rays.
Step 5: Frequency of Treatment
The frequency of at-home microdermabrasion treatments depends on your skin type and the specific product you are using. In general, it’s recommended to start with one treatment per week and adjust as needed based on your skin’s response. Avoid over-exfoliating, as it can lead to irritation and dryness.
IV. Considerations and Precautions
While at-home microdermabrasion can be effective, there are some essential considerations and precautions to keep in mind:
Skin Type: At-home microdermabrasion may not be suitable for individuals with extremely sensitive or very dry skin. Consult with a dermatologist if you are unsure whether this treatment is appropriate for your skin type.
Patch Test: Perform a patch test with the exfoliating product to check for any adverse reactions or allergies before applying it to your entire face.
Follow Instructions: Always follow the instructions provided with your at-home microdermabrasion kit. Overusing the product or using it improperly can lead to skin irritation.
Avoid Active Acne: Do not use microdermabrasion on active acne lesions or open wounds, as it can exacerbate the condition.
Sun Protection: Sunscreen is crucial after microdermabrasion. Failing to protect your skin from UV rays can increase the risk of sunburn and skin damage.
Hydration: Moisturize your skin after treatment to maintain its moisture balance and prevent dryness.
Limitations: At-home microdermabrasion is not as powerful as professional treatments. While it can improve skin texture and appearance, it may not address more severe skin concerns.
V. Conclusion
At-home microdermabrasion is a convenient and cost-effective way to achieve smoother, more radiant skin. By following the proper steps and precautions outlined in this guide, you can safely and effectively incorporate this exfoliation method into your skincare routine. Remember to choose the right product for your skin type, avoid over-exfoliation, and prioritize sun protection to maintain healthy and youthful-looking skin. If you have any doubts or specific skin concerns, consult with a dermatologist for personalized guidance.


