As we age, our skin loses elasticity and can become saggy and loose. While there are many cosmetic procedures available to combat this issue, not everyone is willing to undergo surgery or injectables. That’s where tape comes in – yes, tape! Using tape for a DIY facelift has gained popularity in recent years as a non-invasive alternative to traditional cosmetic procedures. In this article, we’ll explore how to use tape for a face lift and provide tips for achieving natural-looking results.
Choosing the Right Tape
Before we dive into the application process, it’s important to choose the right kind of tape. Medical-grade tape is recommended because it’s designed to be gentle on the skin and won’t cause irritation or damage. Look for a tape that is hypoallergenic and designed for sensitive skin. Another important factor to consider is the strength of the tape – you want something that will hold up well throughout the day but won’t be too difficult to remove.
Prepping Your Skin
Before applying the tape, it’s important to prep your skin to ensure optimal results. Start by thoroughly cleansing your face and removing any makeup or skincare products. Next, apply a facial moisturizer to help plump up your skin and improve elasticity. This will help the tape adhere better and prevent it from pulling on your skin.
Applying the Tape
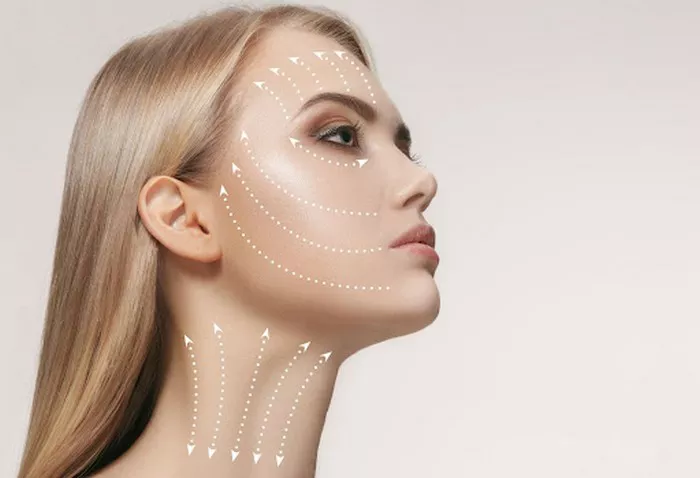
Now it’s time to start applying the tape. Start by cutting a strip of tape that is approximately 3-4 inches long. Place one end of the tape near your temple and gently pull it back towards the nape of your neck, being careful not to pull too tight. Repeat on the other side, making sure both sides are symmetrical.
Next, cut a longer piece of tape that spans from one ear to the other, passing under your chin. This tape should be slightly longer than the first pieces to ensure it covers the entire area. Once again, make sure the tape is not pulling too tightly and adjust as needed.
Finally, cut two smaller pieces of tape and place them vertically on either side of your neck, starting from the base of your ear and ending at the collarbone. This will help lift and tighten the skin on your neck.
Aim for Natural-Looking Results
While using tape for a facelift can provide impressive results, it’s important to aim for a natural look. Avoid pulling the tape too tight or placing it in unnatural positions, which can look obvious and fake. Instead, opt for a more subtle application that gently lifts and tightens the skin while still looking natural.
Removing the Tape
When it’s time to remove the tape, start by gently peeling it off at one end and slowly working your way across. If you feel any discomfort or resistance, apply a bit of oil or moisturizer to help loosen the tape. Once all the tape is removed, cleanse your skin again and apply a soothing moisturizer to help reduce any redness or irritation.
Final Tips and Considerations
Using tape for a facelift may seem like an easy and affordable solution, but it’s important to keep a few things in mind. First, while tape can provide temporary results, it’s not a permanent or long-term solution. For more significant improvements, you may want to consider other cosmetic procedures.
Additionally, tape should only be used on clean, dry skin and never over broken or irritated skin. If you have sensitive skin or are prone to allergies, test the tape on a small patch of skin first to ensure you don’t have any adverse reactions.
In Conclusion
Using tape for a facelift can be a great option for those looking for a non-invasive and affordable alternative to traditional cosmetic procedures. By choosing the right kind of tape, prepping your skin properly, and aiming for natural-looking results, you can achieve a noticeable improvement in the appearance of your skin. Just remember to use caution, remove the tape gently, and consider other treatment options for more significant improvements.

