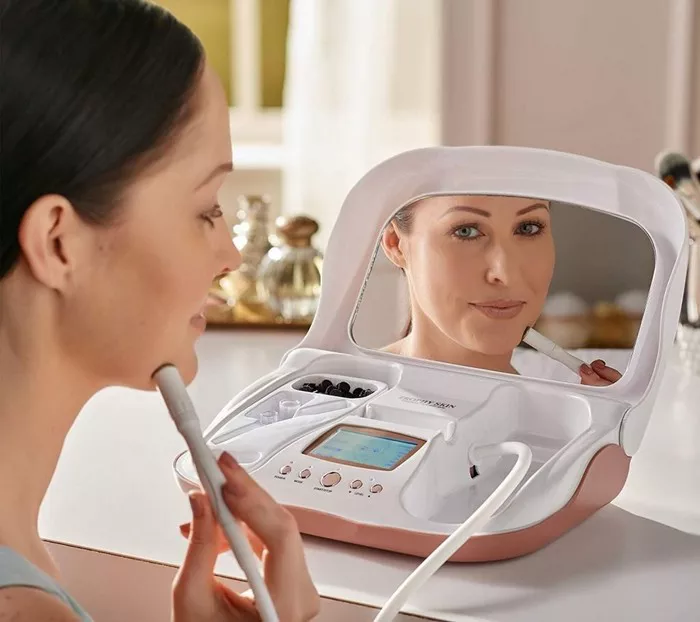
Microdermabrasion is a popular skin rejuvenation technique that can help you achieve a smoother, more youthful complexion. Traditionally performed in a dermatologist’s office or a spa, microdermabrasion is now available in the comfort of your own home. In this article, we will guide you through the process of performing microdermabrasion at home, ensuring safety and optimal results.
Understanding Microdermabrasion
Microdermabrasion is a non-invasive procedure that exfoliates the outermost layer of the skin, revealing a fresher, more vibrant complexion. It works by using a handheld device that emits fine crystals or utilizes a diamond-tipped wand to gently remove dead skin cells and stimulate collagen production. The procedure helps reduce the appearance of fine lines, wrinkles, acne scars, hyperpigmentation, and uneven skin texture.
Performing microdermabrasion at home allows you to take control of your skincare routine and maintain the benefits of this rejuvenating treatment between professional sessions.
Step-by-Step Guide to At-Home Microdermabrasion
1. Choose the Right Microdermabrasion Device
There are various at-home microdermabrasion devices available on the market. Look for a device that suits your specific needs and preferences. Some devices use crystal-based systems, while others rely on diamond-tipped exfoliation. Consider the features, settings, and reviews before making a purchase.
2. Cleanse Your Skin
Before starting the microdermabrasion process, thoroughly cleanse your face using a gentle cleanser. This helps remove any dirt, oil, or makeup that may be present on your skin, ensuring optimal results.
3. Prepare the Device
Follow the manufacturer’s instructions to prepare your microdermabrasion device. This may involve inserting the appropriate exfoliating tip or connecting the device to a power source.
4. Start with a Patch Test
Perform a patch test on a small area of your skin to ensure that your skin tolerates the treatment well. This step is particularly important if you have sensitive skin or are using a microdermabrasion device for the first time.
5. Begin the Treatment
Hold the device firmly and gently glide it across your skin in upward motions. Avoid applying excessive pressure, as this can cause irritation. Pay attention to the specific areas you want to treat, such as the forehead, cheeks, nose, and chin. Avoid sensitive areas, including the eye area and lips.
6. Follow a Pattern
To ensure even exfoliation, follow a systematic pattern while treating each area. This can be done by dividing your face into sections and moving the device across each section in a consistent manner. For example, you can start with the forehead, move to the cheeks, then the nose, and finally the chin.
7. Adjust Speed and Intensity
Most at-home microdermabrasion devices allow you to adjust the speed or intensity settings. Begin with the lowest setting and gradually increase it to a level that feels comfortable for your skin. Pay attention to any signs of discomfort or redness and adjust accordingly.
8. Hydrate and Moisturize
After completing the microdermabrasion treatment, rinse your face with cool water to remove any residue. Follow up with a gentle hydrating toner to soothe the skin. Finally, apply a moisturizer that is suitable for your skin type to replenish moisture and lock in hydration.
9. Sun Protection is Key
Microdermabrasion temporarily increases the sensitivity of your skin to the sun. It is crucial to protect your skin by applying a broad-spectrum sunscreen with an SPF of 30 or higher before heading outdoors. This helps prevent sun damage and maintains the results of your microdermabrasion treatment.
10. Follow a Consistent Schedule
For optimal results, establish a consistent schedule for at-home microdermabrasion. Depending on your skin’s sensitivity and tolerance, perform the treatment once every one to two weeks. Avoid over-exfoliating, as this can lead to irritation and dryness.
Important Considerations for At-Home Microdermabrasion
- If you have any skin conditions or concerns, such as active acne, rosacea, or open wounds, consult with a dermatologist before attempting at-home microdermabrasion.
- Always read and follow the instructions provided with your microdermabrasion device.
- Do not use microdermabrasion on sunburned or irritated skin.
- Avoid using the microdermabrasion device on active breakouts or areas with inflamed skin.
- Be gentle with your skin during the treatment to prevent excessive redness or irritation.
- If you experience any unusual or severe reactions, discontinue the treatment and consult a healthcare professional.
Conclusion
Performing microdermabrasion at home is an effective way to rejuvenate your skin and maintain a healthy, radiant complexion. By following the step-by-step guide outlined above and considering important considerations, you can safely and effectively incorporate at-home microdermabrasion into your skincare routine. Remember to be consistent, take precautions, and listen to your skin’s needs. Enjoy the benefits of microdermabrasion from the comfort of your home, revealing smoother, more youthful-looking skin.


